Case Study 3 - Kim

Overview: Kim was dissatisfied with uneven edges of her front teeth and wanted to improve the shape and have the color look natural. We begin by designing the teeth to restore the tooth structure she had worn away. Prior to any definitive treatment, we tried in the design to make sure that this final result is what she was hoping to achieve. She loved the new smile design and decided to proceed with reshaping the teeth for veneers. After the reshaping appointment, the patient wore temporaries to make sure she was happy with the new shapes before making the final restorations. After she approved of the temporaries, a master ceramist fabricated the veneers based on the patient's approved design. The veneers are then tried in for the patient to approve them prior to bonding them in place. The patient was thrilled with the final natural looking result.

Step 1 - Primary Concern

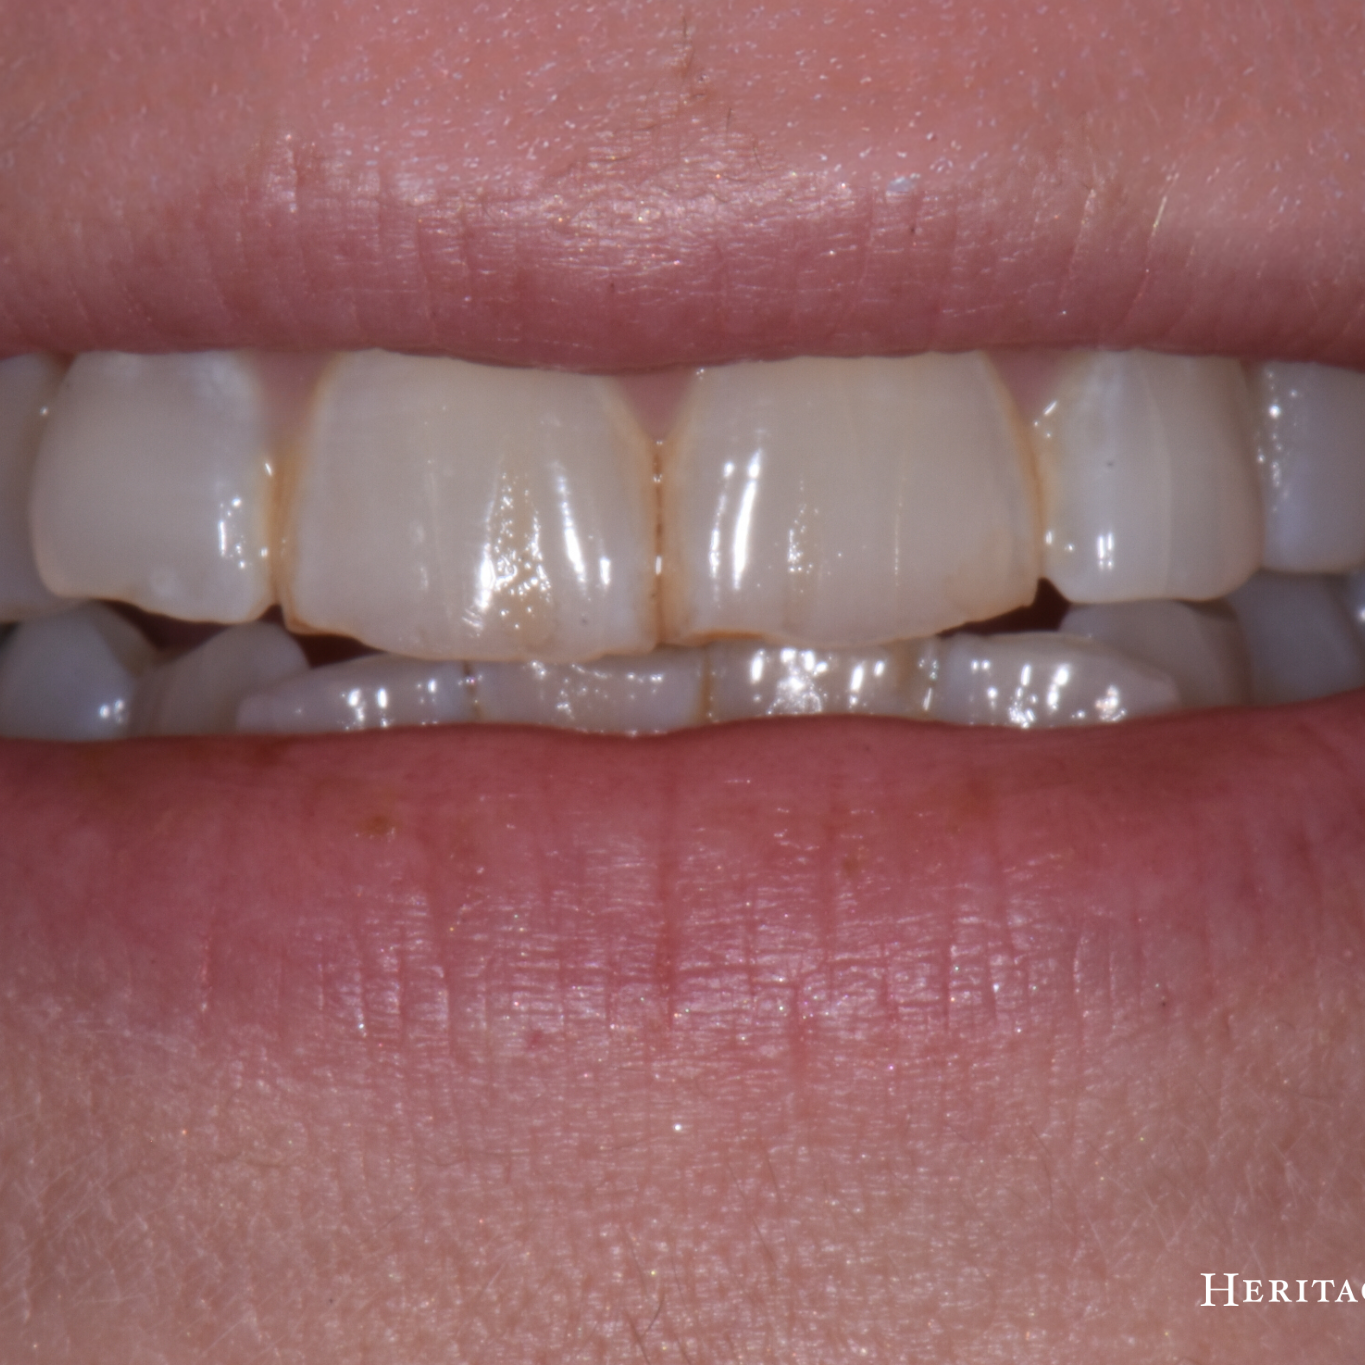
Primary concern: uneven edges making the teeth look small

Step 2 - Analysis

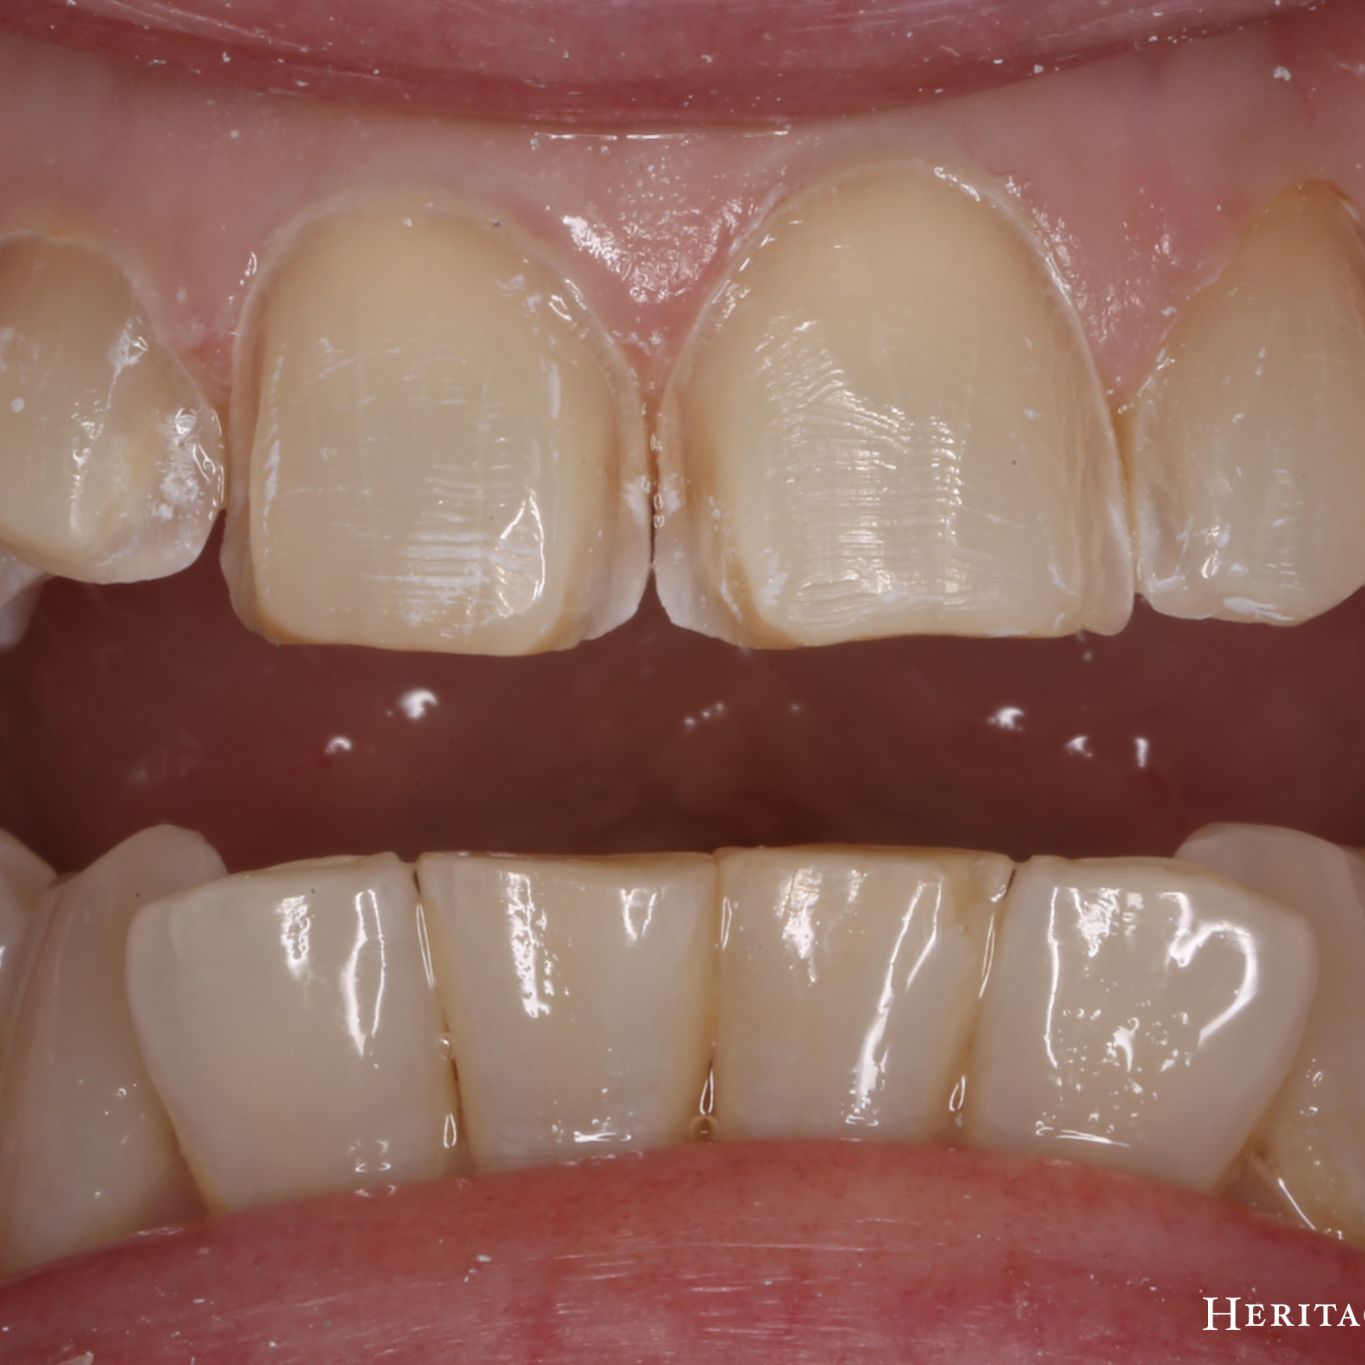
Night time grinding caused the uneven wear on the front teeth

Step 3 - Before Full

Ideally the edges of the front teeth should follow the lower lip. The overall plan is to lengthen the front teeth to make the smile more full and to fill in the dark space on the sides of the smile (buccal corridor).

Step 4 - Design

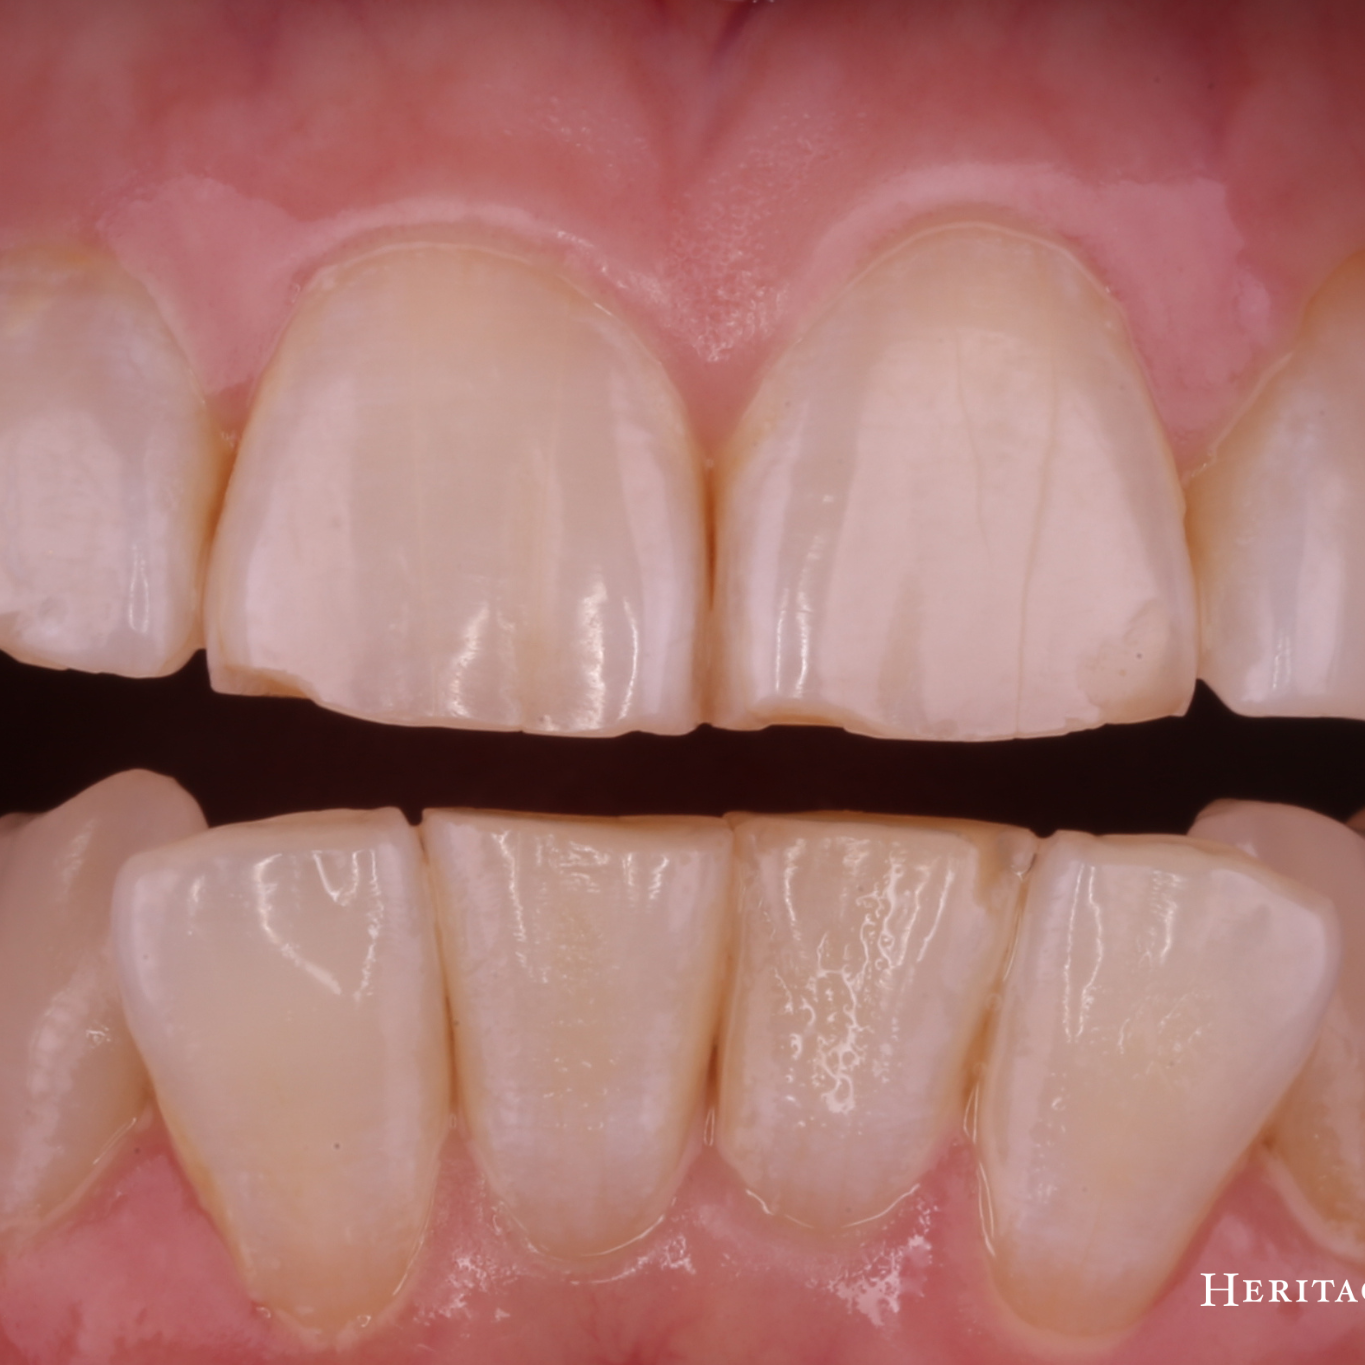
This is a close up photo of the new smile design. At this appointment we try in the new design with temporary material to see if Kim likes the shape of the new teeth. This was the outcome she was looking for and we decided to move forward with the veneers after seeing this design.

Step 5 - Reshaping

The teeth are reshaped (about 0.5mm). In this case, the veneers have to wrap to the back side of the teeth because there were small cavities between the teeth.

Step 6 - Temporaries

These temporaries are made the day the teeth are reshaped. This allows the patient to make sure she likes the shape of the new teeth. At this point, she can make changes if there is something she does not like.

Step 7 - Temporaries

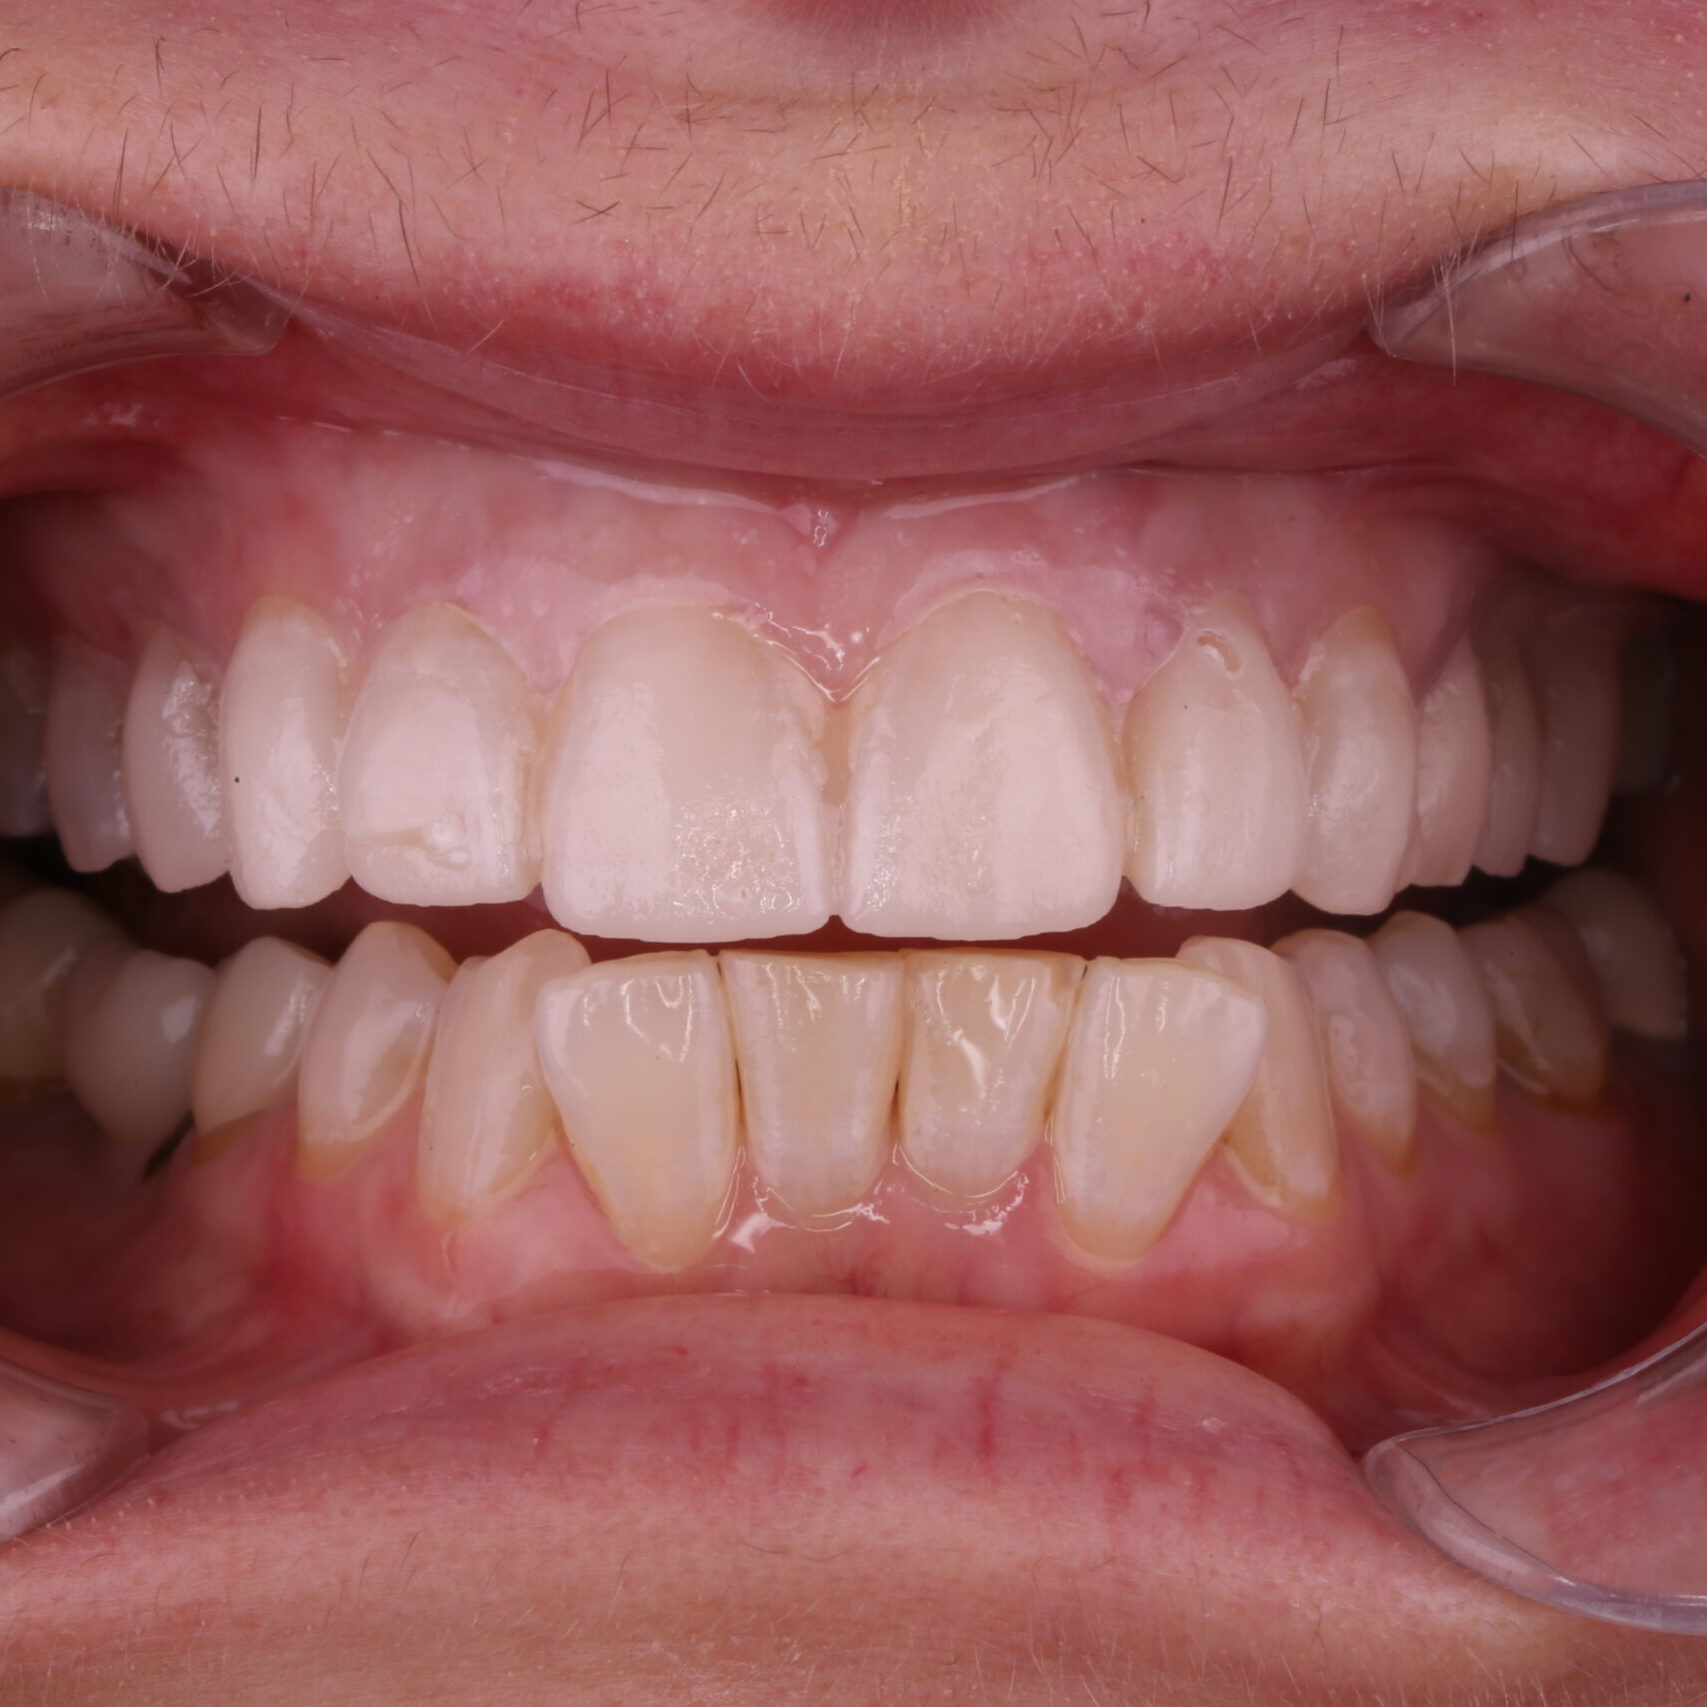
This photo was two days after the reshaping appointment. This is where we check to make sure the new design looks good in the patient’s face. In Kim’s case, the teeth are longer and the smile is much more full.

Step 8 - Final Veneers

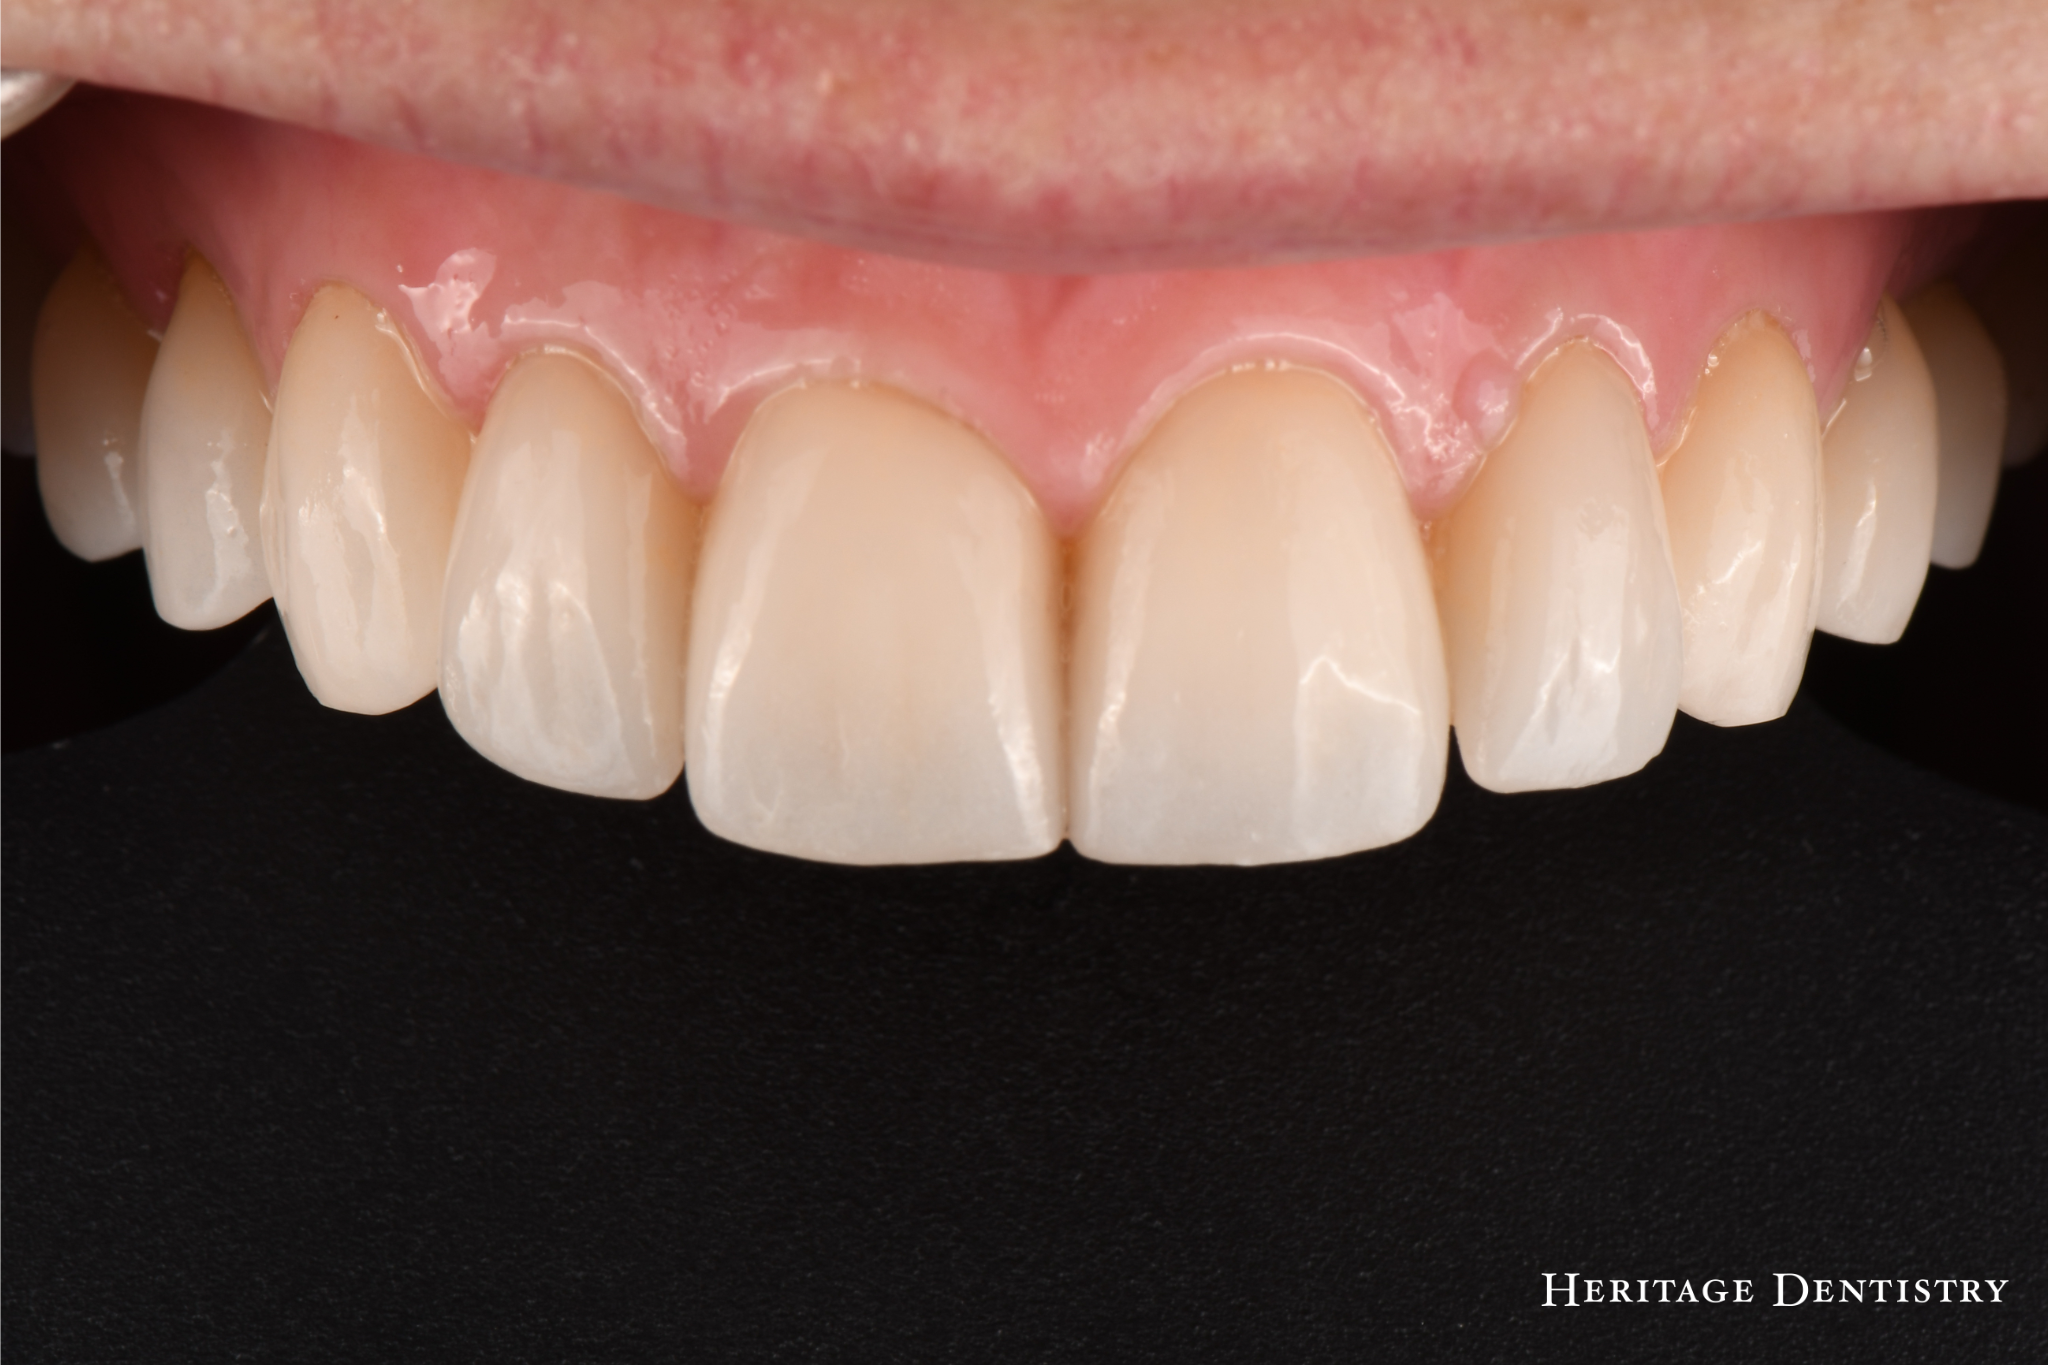
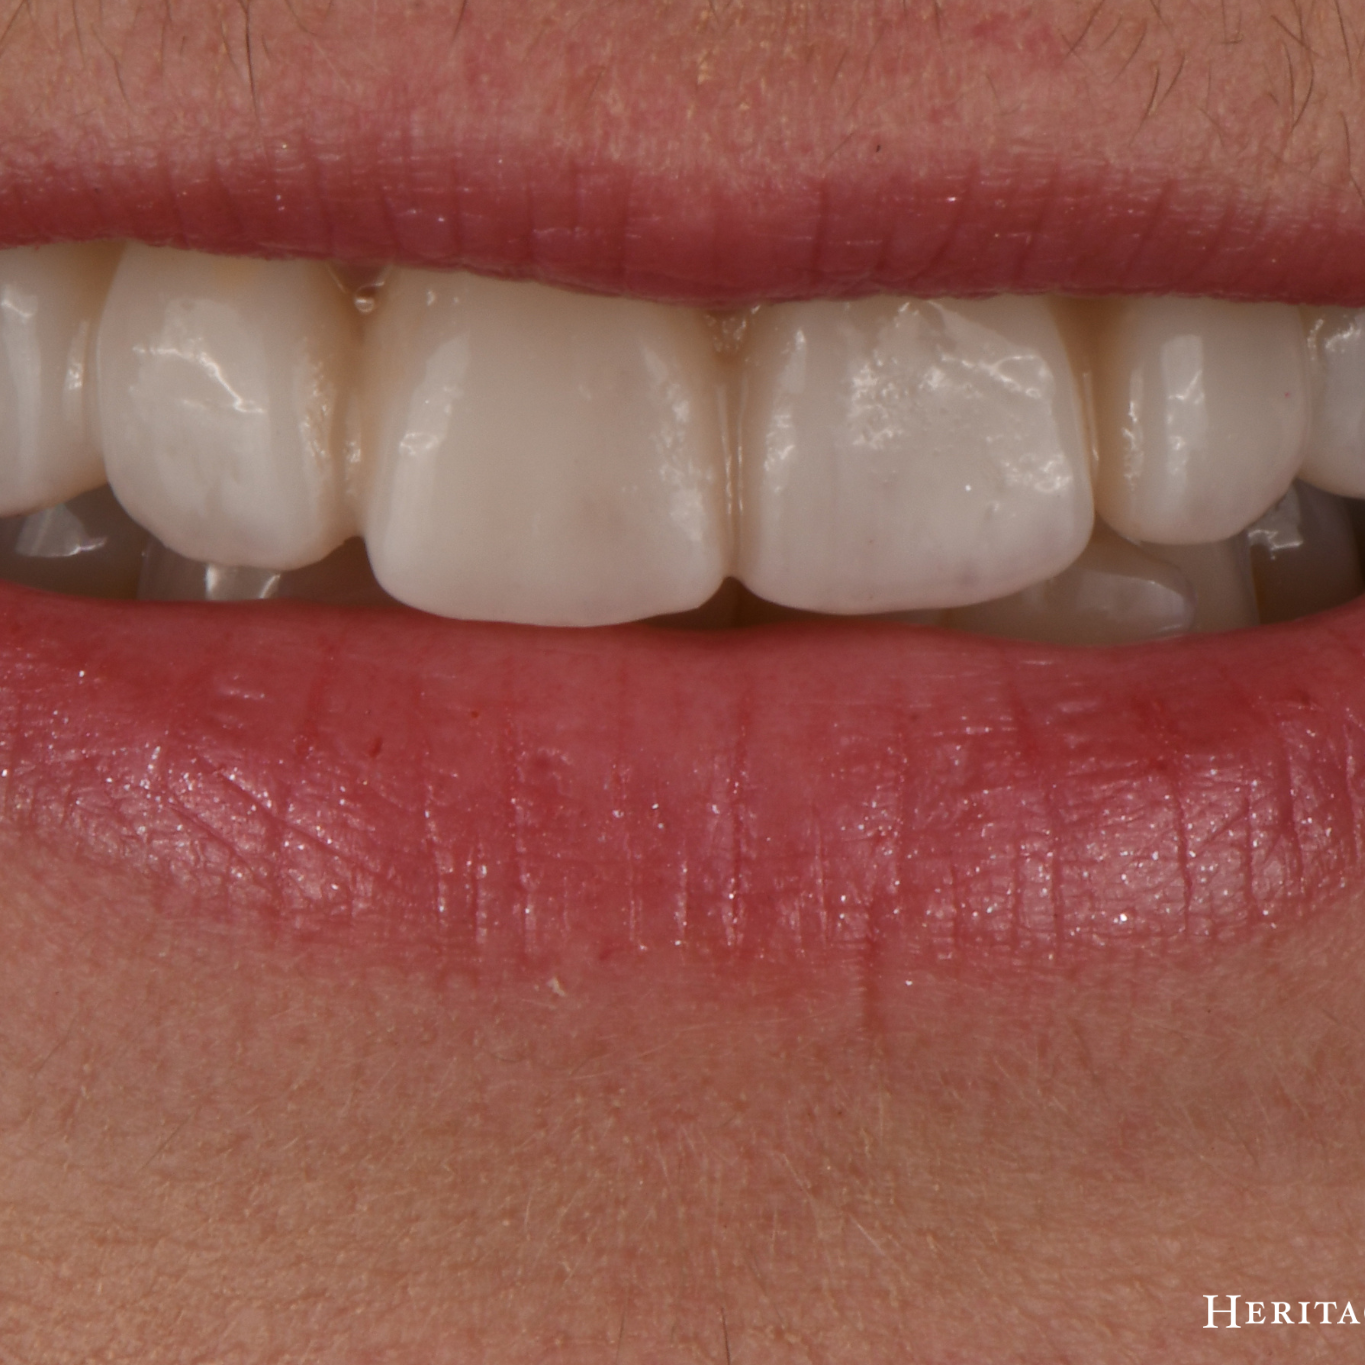
The new shape of the teeth follows the lower lip and fills out the sides of her smile. The goal was for the teeth to look natural and not bleach white.

Step 9 - Final Full

Final Veneers (Full face)- This photo confirms that we achieved the goal of giving Kim a full, natural smile. A night guard was made to protect the veneers. She was thrilled with the results!

Our Patients Love Their Experience with Us

Our Patients Love Their Experience with Us

Lisa Stroup
a week ago
Dr Hamrick recently replaced a crown for me and did a wonderful job. New technology allowed me to have only one visit for the complete...
David Dubocq
a month ago
Today was very enlightening for me. Dr. Hamrick was able to install a crown on my back molar , that he made at his...

SMILE WITH CONFIDENCE. CALL TODAY.

(864) 292-5125

Patient Financing

Find out More about our Patient Financing Options to make your advanced care more affordable
Meet Dr. Preston Hamrick
About Your First Visit